Friday, October 29, 2010

Tutorial for Baby Quilt with Scraps


We have a few babies coming our way in the next year or so.  My daughter was home sick with a fever and laying in bed, so I couldn't weave.  So, I decided that I would take my bags of scraps leftover from sewing dresses for her and myself and see what I could pull together for a quilt.  I can never throw away all those scraps, I even have trouble throwing away the little pieces, so I have bags of scraps sitting around.

I do have a confession to make.  I hate making "traditional" quilts.  I don't have the patience to make all those beautiful patterns match and it frustrates me to have to be very exacting with both cutting and sewing.  Instead, after seeing Gee's (hard G) Bend quilts made by the ladies of that area of Alabama, I knew that I finally met a quilt that I would be happy sewing.  Please have a look at these quilts.  They are lovely works of art that have a very modern feel.  So, here is my very modest nod to their work.


I tried to pull things in a flower theme and as you can see I have lots of flowers and pinks and some greens mixed in.  My daughter is still in her pink phase.  I then just cut these random pieces into the biggest squares and rectangles that I could manage.
For this task, I have found a rotary cutter and big clear quilting ruler to be the best.  After lots of cutting I ended up with a much smaller pile of scraps.  Although I did still pull out some of the bigger pieces to save...maybe I will use them later for something else?

I then started laying out the scraps and working with them until I had the quilt about the size I wanted.  I layed the scraps out on a baby quilt that was made for me as an infant, so it gave me a good idea of the size that I could pull together.  Then I rolled up the quilt and carried it into my sewing room.

 I started piecing in the middle and worked my way out, ironing each piece as I went.  So, in about 6 or 7 hours I had the top to the quilt put together.  I then had to buy some fabric for the backing and the binding.  I was hoping to use commercial binding, but I didn't find anything, but I did find some fabric that I can use later to make my daughter a dress.  I decided to use a soft cotton flannel for the backing.  I then laid out the quilt top on the dining room table, laid cotton batting on top of that, and then layed the backing fabric which I had washed and dried already on the top.  I then cut around the batting and backing fabric leaving quite a bit of excess to allow for "pulling in" when I quilt it.


On one of my first quilts I did not leave enough excess batting and backing fabric and had to end up piecing more backing fabric to finish.  So, MAKE SURE YOU HAVE ENOUGH EXTRA BACKING FABRIC!

Next, I safety pin the sandwiches together all over the quilt, 6-8 inches apart.


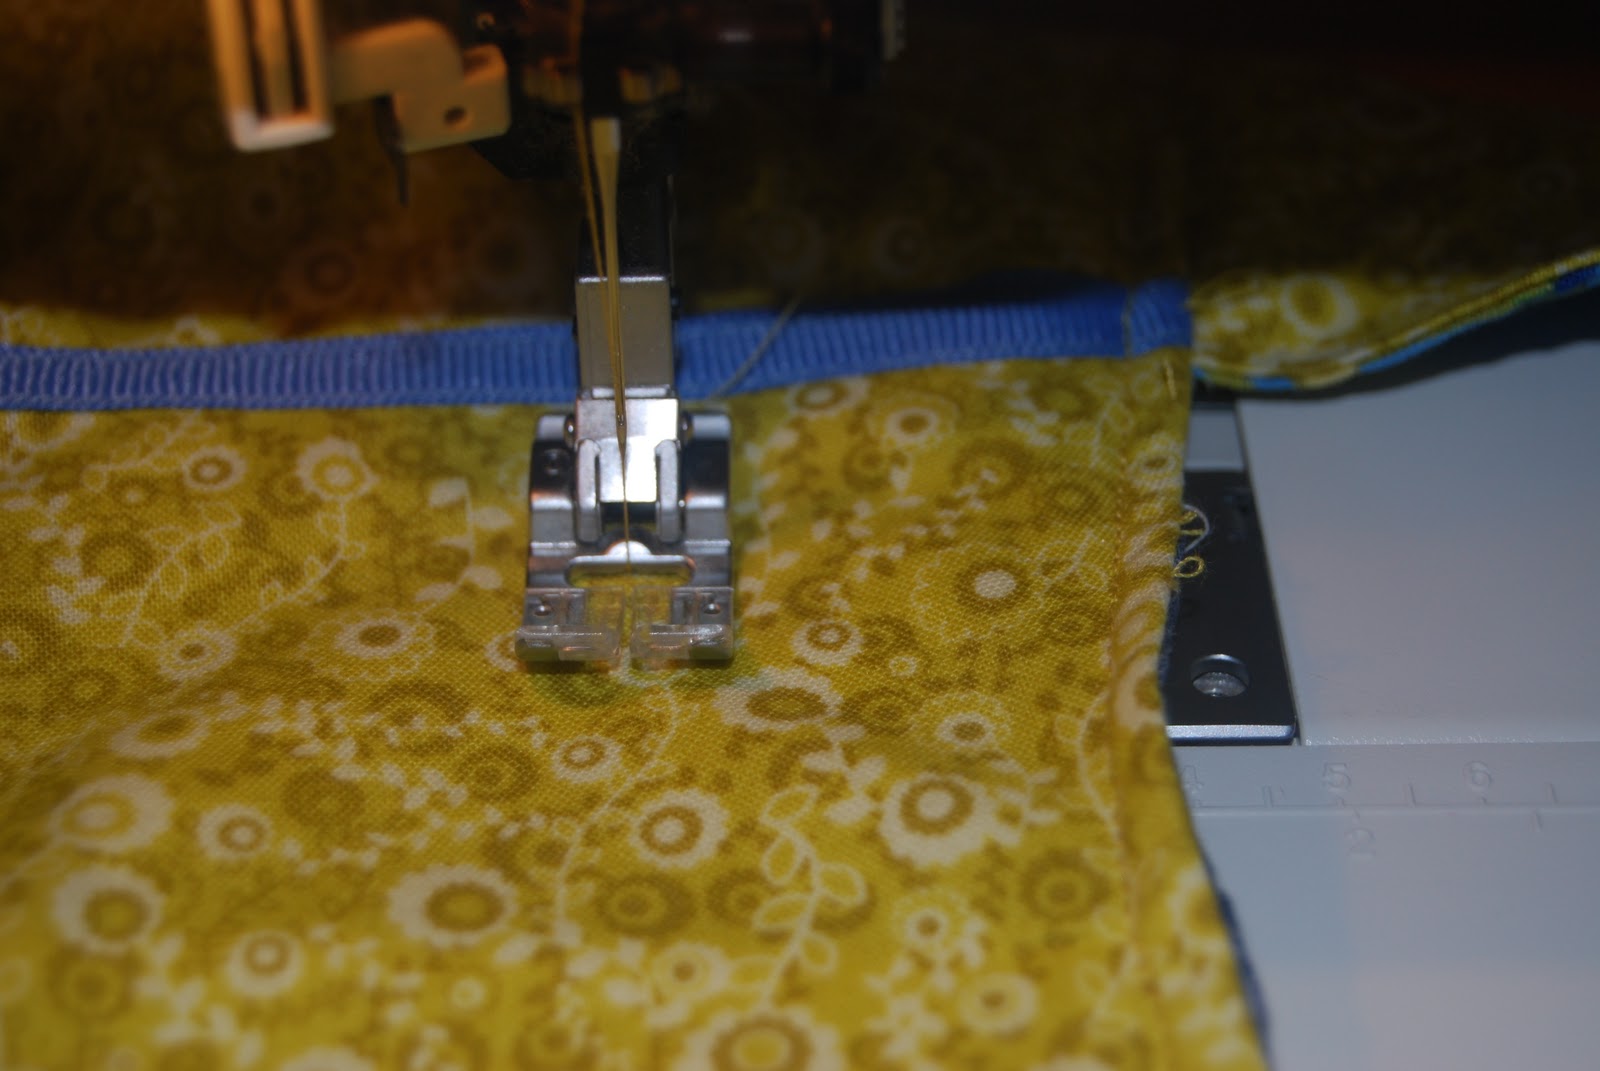
Next I machine quilt it.  Because I am not very adept at machine quilting, I use the "stitch in the ditch" method where I stitch in the joint between two fabrics.  I use a straight stitch set at 2.5 mm.  I have to admit that sometimes I wavered a bit out of the ditch.  If the fabrics were light, it didn't make too much of a difference, but if the fabric were darker, it showed.


My solution was to use a different stitch for some of the squares where my stitching wasn't great.  I have a hand quilt stitch on my machine and you can see the results below.  So for some of the blocks, I used this stitch to quilt.  As a result, different blocks are quilted differently.


You have to be careful quilting the blocks and make sure to check your backing fabric periodically to make sure that it is not getting shifted, pleated accidently, or caught some other way.  I make sure I smooth out the fabrics before I quilt a given block.

After all the quilting is done, I lay the quilt back out on a big table and cut the excess backing and batting off.  Now it is time to bind the quilt.  I cut my own bias 3 inches wide on the diagonal (45 degrees).  I then sewed the pieces together to end up with one long strip.  I ironed the strip and folded it in half and then began to sew it on the quilt.  I started toward the end of one side and left about two inches of the end unsewn.

I stitched it 5/8" from the edge.  When I got to a corner, I sewed 5/8" from the edge and backstitched.  I then folded the bias away from the quilt to make a triangle as shown below.


Next, I folded the bias down along the next side and hand creased it and pinned it.  I started sewing just to the edge of the triangle underneath.  You will need to feel it with your hand and just miss the underlying triangle of bias.  This takes a bit of practice.


After sewing the four sides with their associated corners like this, I made it back to the start. 


I cut off the corners of the ends as I show above, and then fold it inside and stitch it down.  Unfortunately, I sewed the finish edge facing me.  So, I had to rip out the stitches and put the finished edge on the bottom so as I turned the bias and stitched it to the backing, the finished edge would face outward.  Thank goodness for my mom's old awl; it works really well at pulling out stitches, especially when using strong quilting thread.


 Finally, I hand rolled the bias over and stitched it by hand with doubled quilting thread so it would be really strong.  I left the 5/8" or more of the backing and batting rather than trimming it.  I had to roll the thicknesses over to the back, but the result is a padded binding that looks like a cross between a binding and piping, which I really love.  It is a bit harder to work with on the corners though.


On the corners, I trimmed off the corner of backing and batting fabric, then I sewed one side down.  Next fold the other side down and work with it until it lays flat and sew it down.  You should have a miter on the front of the quilt and a fold on the back as shown below.  It takes a bit of practice to get this and it is a bit frustrating.  I definitely find this the hardest part of sewing the quilt together.


Now, you have a completed baby quilt.  Something your children will treasure.  My daughter is using my baby quilt  made in the early 60's and my son has a large blue jean quilt that he loves that my mother and I made together.  I also have a quilt that I cherish that my neighbor sewed from clothes that my sister and my friend's daughters wore sewn in a Dresden Plate pattern that I really love and cherish.  It is from the early 70's and we still use it today.


My only issue with the quick quilt is that until I photographed it I was really happy with it.  After photographing it, I noticed that it was quite unbalanced on one side as you can see below.  There is a very dark strip to the left that throws the whole quilt off.  If this was an art piece, I would fix it, but on the bed or in the crib it doesn't show like it does when it is hanging, so I am going to leave it, but I will definitely check the quilt top more carefully for balance when I make another one.


Wednesday, October 6, 2010

Sweater Surgery

In the early 90's I made a cardigan that I just loved with Missoni wool.  The wool was/is a beautiful blend of colors that knits up beautifully.  I am saddened to say, they quit making knitting yarn to concentrate on the clothing side of their business.  It is getting harder and harder to find their yarns, but it is well worth the hunt.  In any case, I made this sweater using a fair isle technique.


 However, the sweater was quite large on me and unfitted, plus I had put heavy metal buttons on it and it stretched out in the front pretty badly.  After years of sitting in my closet getting little wear, I decided it was time to perform some surgery.  I decided to steek the sweater.  What is steeking?  Scandavians use it for many of their sweaters.  The Scandanavians knit a sweater in the round, then sew two seams down the front of the sweater and the cut up the middle of the seams to form a cardigan.  I already had a cardigan, so I just sewed around all the pieces and then I cut the sweater apart.  Unfortunately, I don't have any before photos because I did this a couple of years ago and the sweater has been sitting around ever since waiting for me to come up with a new design.  I have had a couple of ideas, so I finally sat down and got them on paper.  The first idea was to knit stripes that were small at the waist and got larger toward the hips.


Maybe it is partly the colors I used, but I didn't really take to the stripes.  They seemed a bit busy and competing with the design on the top.  Next I thought about knitting a larger pattern on the bottom, but again thought is was too busy.  Finally, I considered knitting gores.  I have seen a sweater that was knitted in a bright orange with two lighter orange gores put in front and back to flare the hipline of the sweater.  I have always loved the design, so I decided to give this idea a try...


I apologize for the quality of my quick sketches, but it does give an idea.  I liked this idea much better.  Now for the harder part, finding a yarn that will work with the colors already in the sweater and available in a darker and lighter shade.  I have drawn the gores in a darker shade, and the main part lighter, but I may reverse this idea depending on what kind of yarn I can find.  I like the subtlety of this design, not so busy to compete with the pattern above, but not a plain knit so that it doesn't look planned and just added on.

The next step is to take the sweater pieces that I have and cut them down to the proper size for a better fit.  I took a fitted jacket pattern to be made with a heavier wool and took the back pattern piece and cut the pattern out of an old t-shirt.


I then pinned the front pieces of the sweater to this pattern piece to check the fit and size the front pieces of the cardigan. One problem that I knew I faced was the front of the sweater was stretched from the heavy buttons.  I then took the pieces and steamed them with my steam iron and worked them back into shape.  You can see the difference the steaming made below.


Next, the t-shirt pattern piece I cut was giving me some problems, so I cut a new pattern piece out of a leftover dress muslin I made several years ago.  The crazy pattern pieces are really used sheets.  I often use worn out sheets for muslin rather than buying new. 

Now comes the next hard part, I need to stitch around the pattern with a sewing machine using a small stitch (1.5-2.0) without stretching the sweater, and then cut the excess sweater around the edges.  I will continue with this tutorial as I make further progress.

Tuesday, October 5, 2010

Feliz Dress: Part Deux

I am going to continue with the Feliz Dress construction.  Now that I have finished the overdress, I will show how I sewed the underdress.  First, I decided to mix several fabrics for the underdress, but unfortunately, I didn't have quite enough to get the whole side underdress pattern on my fat quarters.  Since the overdress and underdress are stitched together and the top part of the side underdress does not show, I cut the side dress into two parts and stitched them together.  This way I could use the fabrics that I had onhand in my stash and know one will know, except that I am now sharing this idea with you.  You can see the seam on the wrong side of the fabric in the photo below.  I did this for both side dress pieces.


For the back of the underdress, there are two elastic pieces so that the dress fits a bit better and so that the child can put the dress on by herself.  First you sew the facing piece onto the back with right sides facing.

Next, I serged the top edge.

Turn the fabric and press.  Next, I marked the pockets where the elastic goes through on the back with soap.  My mother taught me this trick.  It works well on darker fabrics.  If you save slivers of soap, you can mark the lines, and then they wash away.

This is not a super dark piece of fabric, but you can see the marked lines below.

After I sews the pockets for the elastic.  I then cut the elastic pieces as directed, and inserted them into the sewn pockets using a safety pin.

I stitched the elastic pieces securely, pulled them to about 2/3 the length to gather, and stitched the other side securely to hold them in place and cut off the excess elastic.

The finished back piece is shown below.


Next, I stitched the side pieces to the front and back pieces of the underdress.

I pressed open the seams, and then going in my own direction, rather than making a hem facing for the underdress or struggling with gathering the hem, I opted to make my own seam binding.  I had some fabric in my stash given to me by a friend, so I made the binding with this polka dot fabric and then I sewed the bias binding to form a hem for the underdress.

Next, I made the straps for the dress.  I made the top of them to match the overdress, I stitched the two front strap pieces to the two back strap pieces and then did the same for the underside.

I made the underside from scraps left from the fabric from the front and back pieces of the underdress.  
Once the top and underside pieces of the straps are sewn together, you turn them and iron them.  I then topstitched them.

Finally, you are ready to join the underdress and the overdress. WARNING:  this is the most difficult part of the construction.  I did this step 3 times. 
You are supposed to pin the straps to the overdress as shown below. 
This places the straps in the middle of the sandwich iof the over and underdress.  You are to place the straps as indicated on the marked pattern, baste all the layers together and then sew them.  I have to say, I did not baste them.  BIG MISTAKE.  You first have to align the seams of the overdress and underdress and then ease the fabric to get them to join together correctly.  I found this a bit tough.  I am not sure basting would have helped that much, but in any case, I sewed them together and found the straps did not fit my daughter very well.  I ripped the seams and tried again, and still did not get them quite right, so then I ripped the seams just in the front part and left the rest of the dress together.  Reset the straps to fit her body yet again.  The third time was the charm!  I suggest that you pen the dress together, baste, try the dress on your child for fit so you can adjust the straps ahead of time.  Then maybe YOU won't have to sew it together three times as I did!  I have to say, the directions did suggest basting.


I then sewed the pockets on the overdress for the sash to fit through.
  

In the final fitting, I found the front was just too wide for my daughter's slight frame.  So, as I often have to do, I improvised.  I made a little pleat in the front and then I sewed on a button.  I figured as she grows, I can always let the pleat out.  There is enough room in this dress for her to wear it a while.


Both my daughter and I were pleased with the final results.  I figure as she grows taller over the next year or so, I can always add a bit of length to the bottom of the underdress with bias or facing.  There is plenty of room for growth in the dress.  We have been stopped around town several times by people admiring this dress and her sweater.  I think the dress is well worth the effort and I am sure I will sew another Feliz dress.  All is quite easy except for joining the underdress and overdress which is not hard, but takes some care.  I hope these directions can help if you decide to sew this lovely dress shown below.  I recently read that you shouldn't showcase your "wares" by photographing them in your house or garden, but here I go, photos of the dress in our front garden.  Hopefully the dress still shows despite the setting!


Monday, September 27, 2010

Sewing the Feliz Dress

I found this great book in Barnes and Noble one day as I was browsing.  I wasn't intending to buy anything, but occasionally I peruse the craft section just to check the new books and look through them.  In general, I don't find much I like, but this book caught my eye:
Sewing Clothes, Kids Love by Nancy J.S.Langdon and Sabine Pollehn.  It is a great book with a number of fun clothes to sew, great ideas for combining colors and prints and embelling with ribbons and other trims.  I had a lot of fun with this book making a couple of things, a T-shirt, then a fun little jacket, the Avalon jacket.
I don't think I have ever had so much fun sewing a kids jacket.  It was easy to sew, fun to embellish, my daughter loves it, and I made it from a bunch of fabric I had left over from other projects.  Oh, and many of the ribbons came from Laura Foster Nicholson's grab bag of ribbon scraps.  The skirt is a quick sew from Leisl Gibson of Disdressed and Oliver+S.  She has a great tutorial on how to make this skirt, the Lazy Days Skirt.  My daughter can wear the jacket with this great skirt or with a pair of pants.  I keep thinking I will make myself a jacket like this soon.


After a summer off from all but handwork this  summer, I decided to sew something to go with this fish sweater that I made.  This was my first design effort, I made it about 6 years ago.  I originally made this sweater for my son, but it looked a little girly on him, so it got stashed.  In the meantime, I had another child, this time a daughter, she has finally grown into the sweater, so now she needs something to wear it with.


I took the sweater out to find something to go with it.  I finally found a mix of things from the fabric store and from my leftovers from other projects. 
 I was going to make a skirt but my daughter really wanted a dress, so I chose the Feliz dress from Nancy Langdon's book.  I decided that as I sew this dress, I will show how it is going step by step.

I first made the sashes then put together the overdress pieces with the sashes sewn in place as marked on the pattern.


The next step was to sew on the facings if you wanted them which I did, then hem the dress.  If you have hemmed a curved skirt before you know that you have to ease it in.  I hate easing a hem.  From reading the blog disdressed I learned a technique from Liesl that I will share.  You can cut 2 inch strips that follow the curve of the hem from leftover fabric and stitch it to the bottom of the skirt which I did.  To get a full tutorial on how to do this see Oliver + s's  tutorial.  I think I did mine a little differently.  So I will briefly explain here, but you should check Oliver +s  to see how Liesl did it.

First, I layed out my extra fabric from the overdress, and took my cutting wheel and cut along the bottom of the side pattern, moved the pattern up to the get the same curve and cut a 2 1/2 inch strip that follows the curve at the bottom of the overdress.  I did this for both sides and the front.


Then, I stitched 1/4" inside the inside curve, and then I pressed it to the inside.


I stitched the three bottom pieces together to form one long curved strip along the bottom of the overdress and then stitched it right side to right side at the bottom of the overdress.


Next, I pressed the seams toward the top of the skirt.

I then hem stitiched the hem facing in place.

Finally, I folded in the facings at the two sides of the dress, and blind stitched the hem facing at both edges to have a neat finished edge.


I now have the overdress sewn together.
Next, I will how how to put together the underdress.